As a veterinarian, I've witnessed firsthand how the right equipment can transform a walk from a stressful tug-of-war into a joyful bonding experience for both dog owners and their furry friend. One of the most common tools I recommend is a dog harness, yet many well-intentioned pet parents find themselves tangled in straps and buckles, uncertain if they're mastering how to put on a dog harness correctly.
This guide will change that approach, showing you the proper technique while helping you build trust, ensure safety, and make your daily outings comfortable for everyone.
Summary
Why choose a dog harness? Understanding the benefits from a vet's perspective
Before we explore how to put on a dog harness, I want you to understand why a dog harness often proves superior to traditional collars, particularly for certain dogs. While collars work well for holding identification tags, they concentrate all pulling pressure directly on your dog’s neck.
Dog parents are responsible for choosing the best equipment to ensure their dog's comfort and safety, making informed decisions that can prevent potential health issues.
This creates several concerns that I encounter regularly in my practice:
Protecting the neck
Improving control
For strong or easily excited dogs, a dog harness offers you more control during walks. A front clip harness can be particularly effective as a training aid. When your dog pulls while wearing a front clip body harness, it gently redirects their forward motion back towards you, helping discourage pulling without causing pain. This design is especially helpful for managing lunging behaviors during walks, making it easier to control sudden movements. This humane approach fosters better leash manners over time.
Safety and security
A properly fitted dog harness is much harder for dogs to escape from compared to collars. This crucial safety feature particularly benefits fearful or anxious dogs who might try backing out of their restraint when startled.
I strongly advise against tools that work by causing pain or discomfort, such as prong, choke, or shock collars. They can increase your dog's fear and anxiety, potentially worsening your dog's behavior and damaging the trust you've worked so hard to build. These collars are cruel and should not be used. Positive reinforcement through dog training remains the most effective and humane approach.

Step-by-step guide: How to put on a dog harness
Step 1: Introduction – making friends with the harness
- First, you’ll want to create a positive association with the dog harness before attempting to put it on your dog.
- Start by laying the harness flat on the floor and allowing your dog to investigate it freely. When they approach, praise them warmly and offer tasty dog treats. I recommend repeating this over several short sessions throughout the day or over a few days. Next, hold the harness in one hand and treats in the other. Encourage your dog to touch the harness with their dog’s nose. The moment they do, say “Yes!” enthusiastically and give them the treat. This positive reinforcement makes dogs more likely to repeat the desired behavior in future sessions.
- Now you can progress to luring your dog’s head through the neck loop with a treat. Don’t buckle securely yet—just reward them for putting their dog’s head through, then gently remove it. Repeat this process until your dog willingly puts their head through the opening without hesitation.
- Once they are comfortable with this, you can progress to putting the harness over the body without buckling it and rewarding them. After you have repeated this a few times, you can buckle the harness and allow them to spend a short time wearing it. This should be repeated a few times. Only when they are very comfortable with this, would I recommend attaching a lead and starting to train them. Giving your dog a nice treat afterward helps reinforce positive associations with the harness.
Step 2: Which way do you put on a dog harness? Understanding harness types
Different dog harnesses exist, and the putting on process varies by type. Let me walk you through the main varieties you’ll encounter:
Overhead harnesses: With overhead harnesses, you slide the harness over your dog's head, making sure it sits comfortably around the dog's neck and shoulders. Adjust the straps so the harness fits snugly but comfortably around your dog's body, ensuring it does not rub against the dog's head or restrict movement.
Step in harnesses: For step in harnesses, your dog steps into the harness by placing each of the dog's legs through a leg hole. Once both front legs are in the correct leg holes, pull the harness up so it sits properly on your dog's body and buckle it securely around the chest, ensuring the harness fits comfortably against the dog's legs and belly.
Head collar harness: To start with a head collar harness, you first put the neck loop over your dog's head, then secure the chest loop around your dog's body.
Step 3: How to put an easy harness on a dog – the fitting process
- Once your dog accepts the harness willingly, you can focus on achieving proper fitting. You should fit two fingers snugly between the harness and your dog’s body—this ensures comfort without compromising security and helps you check the harness fit around your dog's chest and dog's belly.
- With your dog standing calmly, gently place the harness over your dog’s head (for overhead harness) or guide them to step into it (for the step in harness). The harness ultimately depends on proper positioning around your dog’s chest and shoulders for maximum effectiveness.
- Bring the harness straps around your dog’s body and buckle securely. I always recommend speaking in a calm, reassuring voice and offering treats throughout this process. Check the fit carefully around the chest, shoulders, back, and especially the dog's belly. The harness fits properly when it’s snug enough to prevent excessive shifting but not so tight that it restricts your dog’s movement or causes chafing. A proper harness fit is important for allowing natural dog's movement and preventing discomfort.
- Most harnesses have multiple adjustment points available. Use these to ensure the harness fits your specific dog’s body compared to standard sizing charts. Pay close attention to the chest loop positioning and ensure no part rubs against your dog’s belly or restricts your dog’s leg movement. Regularly check that your pup's harness fits, especially as your dog grows or changes weight, to maintain safety and comfort.
Step 4: How to put a harness on correctly – final adjustments
To adjust the harness properly, I want you to check these key points systematically:
The neck loop should sit comfortably without choking your dog
Chest straps should allow full shoulder movement during walking
You should fit fingers underneath all straps comfortably
The leash clip (whether back clip or front clip) should sit in the designated position—if using a front-clip harness, attach the leash to the designated front clip for better control
For walks, use a standard leash with the harness to provide better control and safety, especially if your dog tends to pull or gag.
I recommend keeping initial sessions short and positive. Put the new harness on for just a few minutes inside your house, give lots of praise and treats, then remove it gently. This approach helps your dog learn that the harness predicts positive experiences ahead.

Which is the front of a dog harness? Understanding clip positions
Dog harnesses typically feature different leash attachment options, and understanding these will help you choose the right approach:
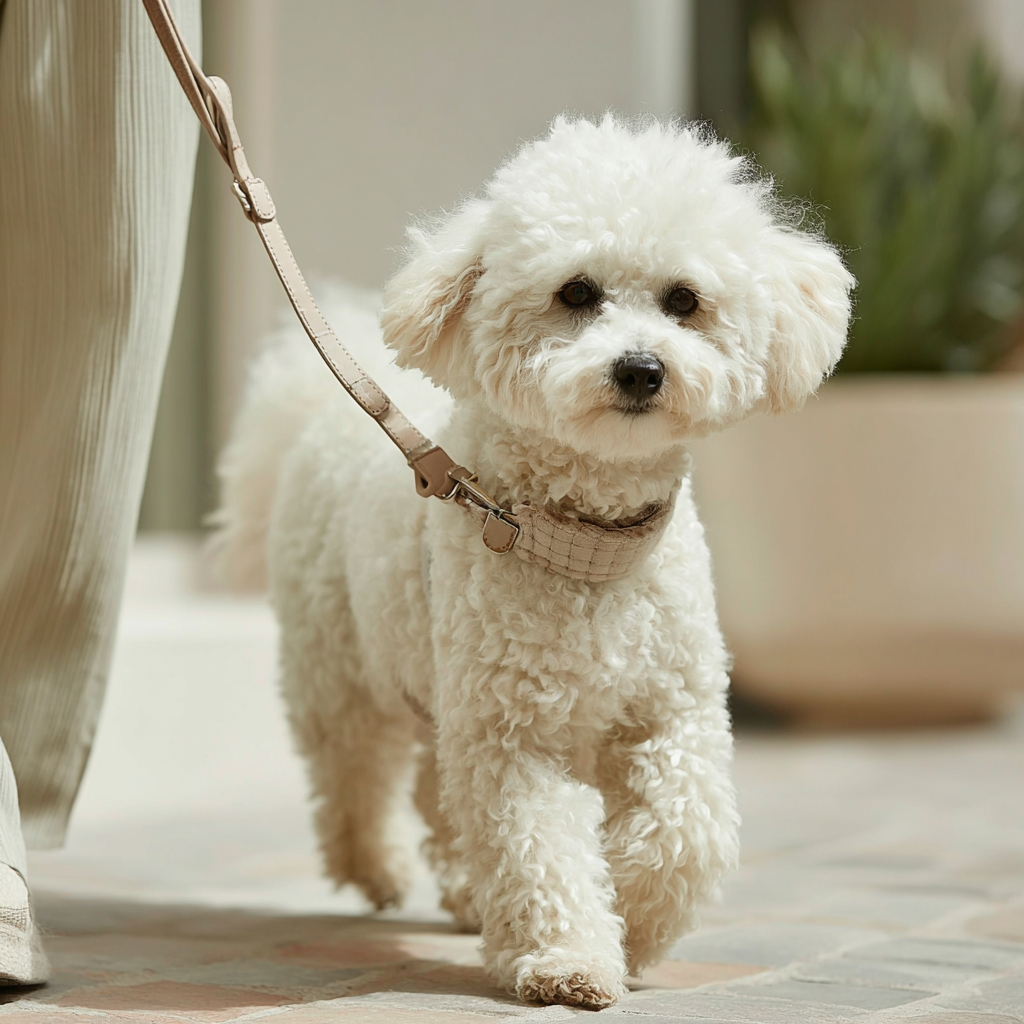
Back clip dog harness: the D-ring sits on your dog's back between the shoulder blades. This back clip leash attachment works well for calm dogs who don't pull excessively during walks.
Front clip harness: the D-ring sits on your dog's chest area. This front clip design helps you control pulling by redirecting forward motion back toward you as the handler.
Dual-clip options: some harnesses offer both front clip and back positions, giving pet parents flexibility to choose the most appropriate attachment point for their dog's behavior and specific training needs.
Choosing the right harness for your dog
The right harness selection depends entirely on your dog's size, build, and walking habits. Here are the key considerations I share with my clients:
For pulling dogs: a front clip harness or no pull harness design works best for these situations. The front clip positioning naturally discourages pulling without causing any discomfort to your dog.
For calm dogs: a back clip dog harness provides simple, comfortable control for dogs with already established good leash manners.
For small dogs: look specifically for padded chest areas and adjustable straps that accommodate delicate builds without restricting breathing or natural movement.
For training: a no pull option combined with consistent dog training techniques helps you establish better walking habits over time.
Traditional dog harnesses work perfectly well for everyday pups, while specialized designs may benefit dogs with specific behavioral or physical needs. I encourage you to consult with a dog trainer or your veterinary clinic, if you're unsure which style best suits your dog's individual needs.

Measuring for proper fit
Before purchasing any harness, measure your dog using a soft measuring tape around the chest, just behind the front legs. This measurement helps you determine the correct size harness for your dog's body accurately.
Remember, you should always be able to fit two fingers between the harness and your dog comfortably—no more, no less.
Building positive associations
Your goal extends beyond simply knowing how to put on a dog harness—you want to create positive experiences that strengthen your bond with your pet. Make harnessing a calm, rewarding ritual by following these approaches:
Using high-value treats throughout the entire process
Keeping sessions short and overwhelmingly positive
Allowing your dog to investigate and become comfortable with the equipment at their own pace
Praising calm, cooperative behavior immediately when it occurs
Never forcing or rushing through the process, regardless of time constraints
If your dog shows distress at any point, stop and go back a few steps and allow them to gain confidence before progressing further.

Conclusion: Strengthening your bond through proper equipment use
Learning how to put on a dog harness correctly transforms your daily walks from potential struggles into genuinely enjoyable experiences for both of you. By approaching this process with patience, positive reinforcement, and understanding of your dog's perspective, you turn a necessary task into a positive ritual that strengthens your relationship.
Remember, every interaction with your pet creates valuable learning opportunities. Dog ownership involves many small but significant moments like these that shape your relationship. By making harnessing a calm and rewarding experience, you ensure not only physical safety and comfort but also strengthen the trust and communication that form the foundation of your partnership.
Whether you choose a front clip harness for pulling tendencies, a step in harness for ease of use, or any other style, the key lies in proper fitting, positive introduction, and consistent, patient application. Your efforts in mastering how to put on a dog harness will pay dividends in safer, more enjoyable walks and a stronger bond with your furry friend.
For everyday pups and calmer pups alike, the right approach to harnessing sets the stage for years of happy adventures together. Take your time, stay consistent, and enjoy the many wonderful walks that lie ahead with your well-equipped companion.

Dr. Ingrid De Wet
Dr. De Wet brings 15 years of small animal expertise to personalized veterinary care through in-clinic work and emergency teleconsultations, contributing to pet health education while drawing on personal experience as a pet owner to understand the emotional and practical aspects of pet healthcare.
The information in this article is based on the following scientific publications:
- Elliott, J., & Grauer, G. (Eds.). (2006-2007). BSAVA Manual of Canine and Feline Nephrology and Urology (2nd ed.). BSAVA Publications.
- Villiers, E., & Blackwood, L. (Eds.). (2005). BSAVA Manual of Canine and Feline Clinical Pathology (2nd ed.). BSAVA Publications, Gloucester
- Horwitz, D. F., & Mills, D. S. (Eds.). (2009). BSAVA Manual of Canine and Feline Behavioural Medicine (2nd ed.). BSAVA Publications, Gloucester
- Harvey, A., & Tasker, S. (Eds.). BSAVA Manual of Feline Practice: A Foundation Manual. BSAVA Publications
- Rendle, M., & Hinde-Megarity, J. (Eds.). (2022). BSAVA Manual of Practical Veterinary Welfare (1st ed.). BSAVA Publications.
Looking for a solution? Start here
Stylla Calmness for cats
Supports relaxation and emotional balance with amino acid-based formulation
- Promotes emotional balance and relaxation
- Helps maintain balanced behaviour
- Supports healthy physiological equilibrium
Made in Switzerland with strict quality standards


